


HOW TO REGISTER AND TO UPDATE YOUR PROFILE
INSTRUCTIONS:
Step 1: REGISTER
Step 2: Update Your Profile
Step 3: Manage Your Artwork
Optional: Add Your Personal Events
2026 Registration Fee:
General Registration: $335.00 – ends Jan 31, 2026Late Registration: $335.00 – begins February 1, 2026
(No Tour Guide Inclusion)
Volunteer Buy-Out: $60
Step 1: Register
NEW ARTISTS OR ARTISTS RETURNING FROM 2021 OR EARLIER
- All returning pre-2022 or new artists: Before beginning, please have your profile image ready.
- Register & pay by CLICKING HERE.
- You will be asked to create a new account.
- After Registering, you will be logged in and appearing in the list of artists. It is important that you immediately add a profile photo and artist statement. Instructions for doing so are below.
- You can stay logged in at all times, much like you do with Facebook or LinkedIn
Step 2: Update Your Profile
NOT LOGGED IN
LOGGED IN
LOGGING IN
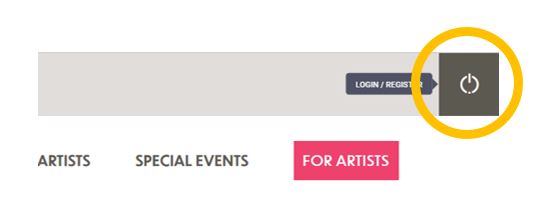
To log in, you can click the round white circle icon at the top right side of your screen. You need to be logged in to update your profile. If you do not see your profile image at the top right of the screen, you are not logged in.
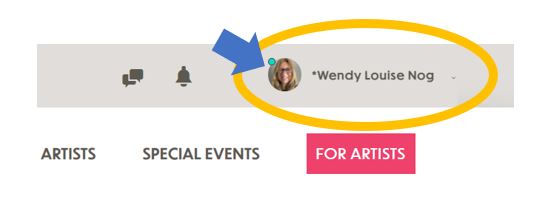
When you are logged in, you will hover over your name to view the editing menu.
When hovering over your name, select the option from the drop-down menu that you would like to update.
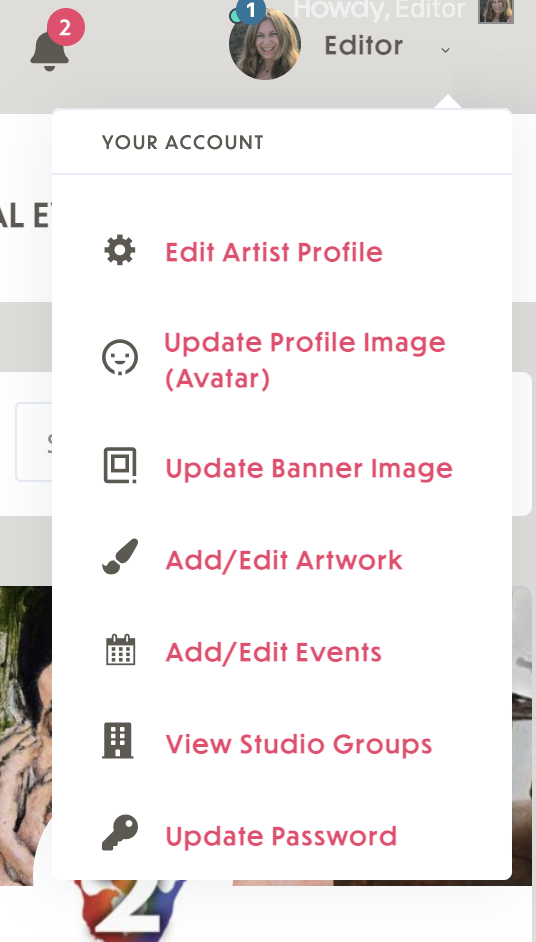
Update Your Artist Profile
*Important: If your profile has been brought over from the old website, you will need to go through the content and look for any irregularities in the text.
There are multiple areas where you can add content to make your profile look great!
- Profile Image
- Profile Header
- Artist Statement or Artist Background
- Studio Location & Information
- Contact Information*
*In order appear on maps, you must set your studio address as one that is offered by the drop-down when you start typing your address.
**Be sure to include “https://” in your website address so that it becomes a link.
How To Put Your Studio On The Map
The website maps are generated by Google. When filling out your studio address, be sure to select an address option suggested by Google in the drop-down.
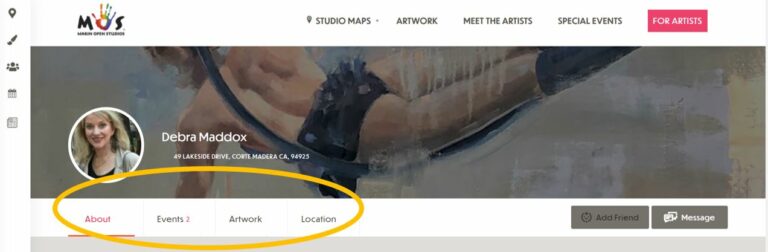
*Please note that if you do not wish to display your studio location, you can leave the address blank, and the “Location” tab will not appear on your profile page.
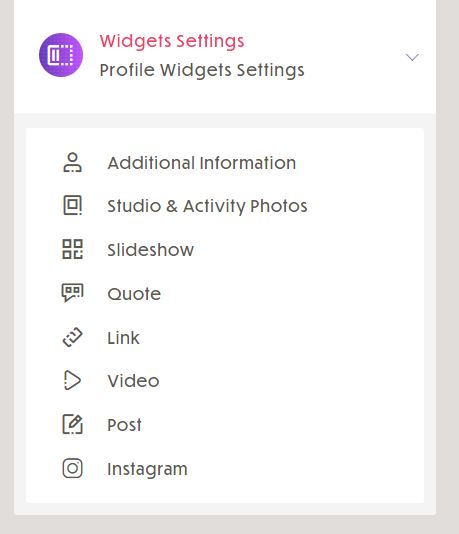
ADDITIONAL FEATURES
There are also special features available for you in the “widgets” section of your admin page. Please note, the Instagram feature is not yet active.
SELECTING THE WEEK YOU WILL BE OPEN
For your convenience, when you register you are automatically signed up for both weeks. If you will only be open for one week, navigate to the map that you do not want to appear on, and look for the grey button that says, “LEAVE GROUP”.
QUICK TIP:
Shortcut To Your Profile
If you become disoriented, and you are logged in, you can always go immediately to your profile by clicking on your image.
Step 3: Add/Edit Your Artwork
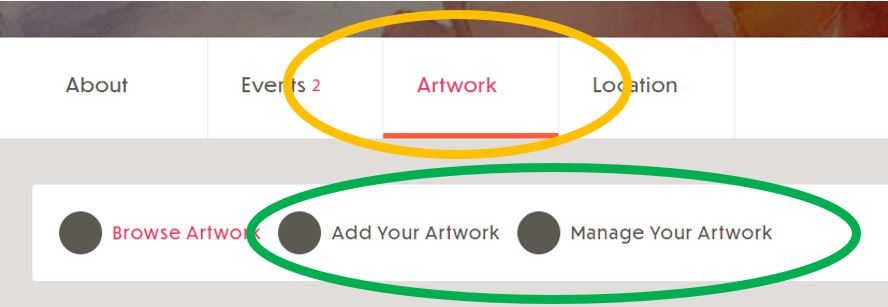
To add or manage your artwork, click on your profile icon to go to your main profile page. You will see a tab called “ARTWORK”. Click on the Artwork tab.
TO ADD AN ART PIECE.
- Select the option “Add Your Artwork”.
- Fill out the form completely, and click on up to 10 categories that apply. The image should be at least 1000 pixels wide for best quality. **Note: you can upload multiple images for each artwork. They will be presented as a slideshow with arrows to move forward and backward.
- Select [PREVIEW] to view how your artwork will be presented.
- Select [Publish Listing] to make it go live.
TO EDIT AN ART PIECE
- Select the option “Manage Your Artwork”
- Locate the piece you would like to edit from the list
- Select “Edit”
- Edit the artwork
- Select “Update” button
SOCIAL MEDIA TIP:
Share Your Profile, Artwork & Events On Social Media!
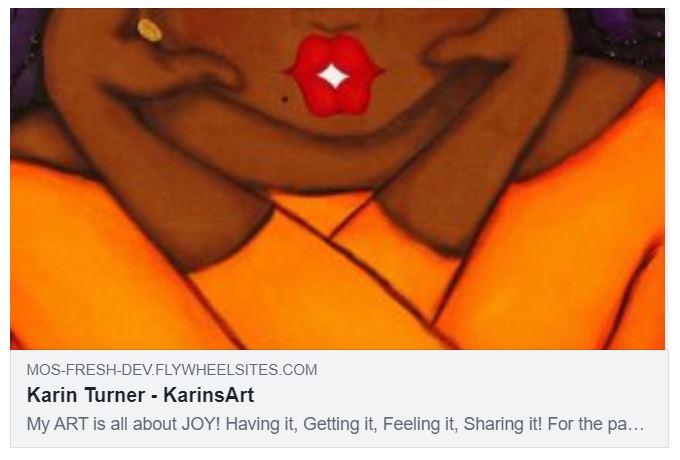
You can share your profile, artwork and events on social media! To do this, copy the URL of the page that you would like to share, and paste it into the platform.

Below is an example of a link might look. The first sentence of your profile, or description of your artwork is used as the descriptive text.
(OPTIONAL) Create Your Personal Events
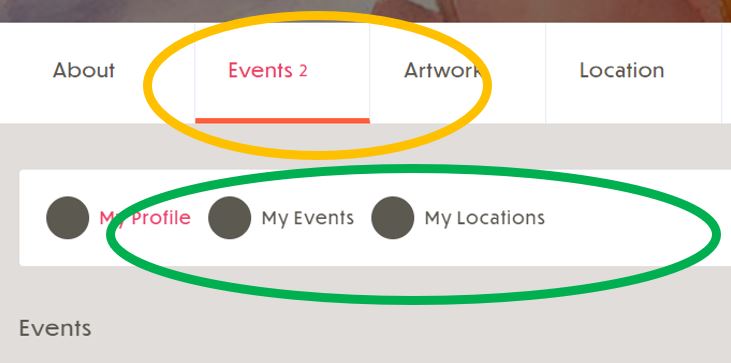
If you are having a special event related to your art, you can add it to your profile. Your special event will also appear on the main Special Events page. To add or manage your events, click on your profile icon to go to your main profile page. You will see a tab called “EVENTS”. Click on the tab.
TO ADD AN EVENT.
- Click on the option: “My Events”. Then click on the button “Add New”. Fill out the form completely.
- Address: The website does not assume that your event is at your studio. Events are often held in varying locations. If you have added your studio previously in the events form, or another artist has added the building, you might find it by starting to type the building or location name. You can then select that location and you do not need to fill out the remainder of the address. If it does not yet exist, fill out the address. A map of your event location will be shown for your review.
- Add a description. Be sure to include your studio or unit number in your description, as Google Maps will only be presenting the main address on the map.
- Upload a photo to represent your event.
- Press “Submit Event”. Your event will be saved.


